When it comes to tomatoes and pepper plants, I’m always feeding an army, even though there isn’t an army in sight. I assume the worst and end up planting way more than I need. So right about now, I’m drowning in jalapeños, which is a weird thing to be drowning in. Perhaps that’s why my eyes won’t stop watering.
Anywho.
If you also have a bumper crop of jalapeños, you’ll want to make a batch of Cowboy Candy. Or seven batches. (I don’t presume to know the abundance of your peppers.)
What is cowboy candy? It’s candied jalapeños. You simmer them in a sweet-tangy, garlicky syrup, creating a wholly addictive treat that bites you back. But not in a ghost-pepper-regrets way. We’re not talking melt-your-face-off heat here.
Cowboy candy is a delicious way to use up a ton of jalapeños fast.
Not to mention, you’ll have the perfect “oh-crap-I-forgot-to-buy-something-for-the-bookclub-Christmas-exchange” gift on hand this December.
Now, if I were a food blogger, this is the part where I would write 2,000 words about the history and origins of this dish, every single tool involved in making it and tell you about the winter of ’96 when my entire family survived on cowboy candy during a blizzard.
Thankfully, for both of us, I’m a gardening writer and not a food blogger.
So, we’ll skip all that cra…er…nonsense and get right to the point. (I’m taking it for granted that you know how to turn a stove on and slice jalapeños without it ending in a trip to the ER.)
First Things First: When to Pick Your Jalapeños
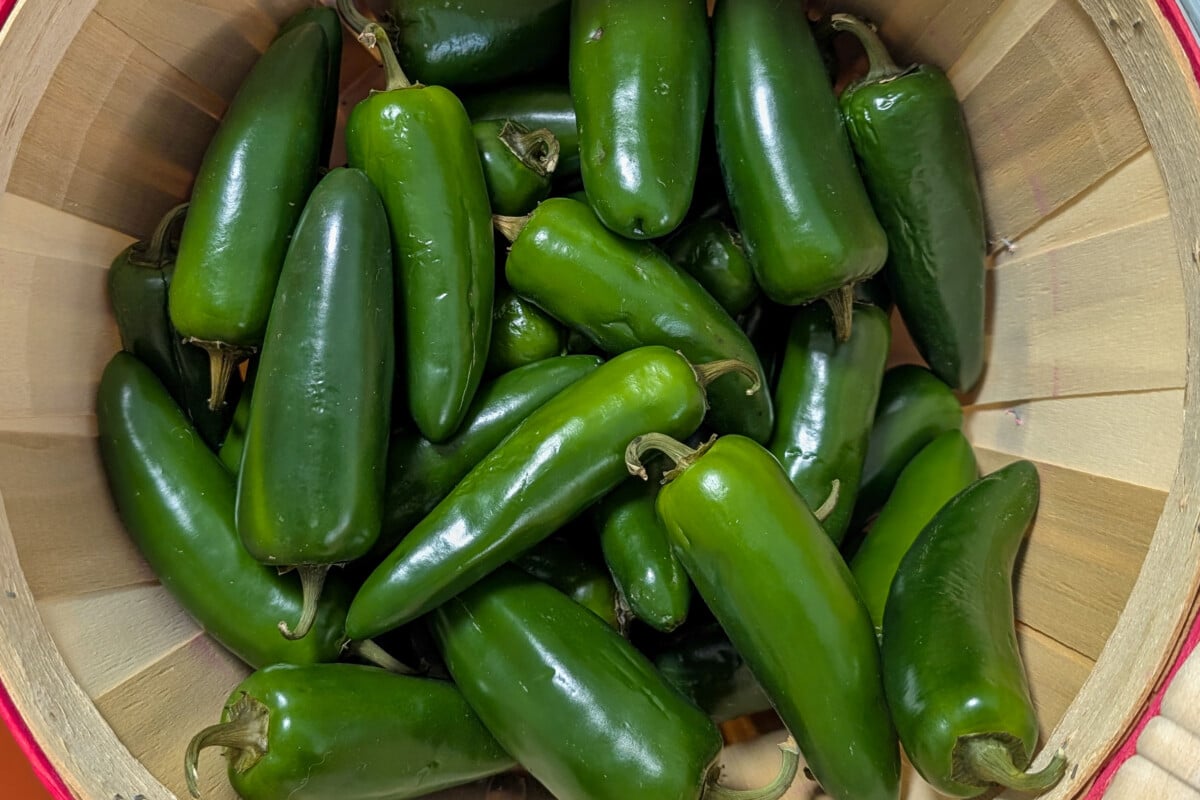
You’ll get the best flavor and the best Cowboy Candy if you start with peppers picked at their peak. Say that three times fast!
Signs Your Jalapeños Are Ready to Pick:
- Glossy, deep green skin (or red, if you want full heat and sweetness, the longer they stay on the vine, the more heat and sugar they develop, so red = better flavor)
- Firm to the touch, no wrinkles or soft spots (we’re talking 20-something Scandinavian model, not…me.)
- Corking, those light brown “stretch marks” on the skin, just as with humans, are a sign of peak perfection, not damage.
- Length of 3-4 inches is ideal
When to Harvest:
Pick in the cool of the morning. This is when the plant is hydrated and the oils (Hello, flavor!) are strongest.
Cowboy Candy Recipe
Ingredients:
- 3 lbs fresh jalapeño peppers
- 2 cups apple cider vinegar
- 6 cups granulated sugar
- ½ tsp turmeric
- ½ tsp celery seed
- 1 tbsp mustard seeds
- 1½ tsp garlic powder
Instructions:

By the way, if you have one, a grapefruit knife works great for removing the pith.
1. Pepper Prep
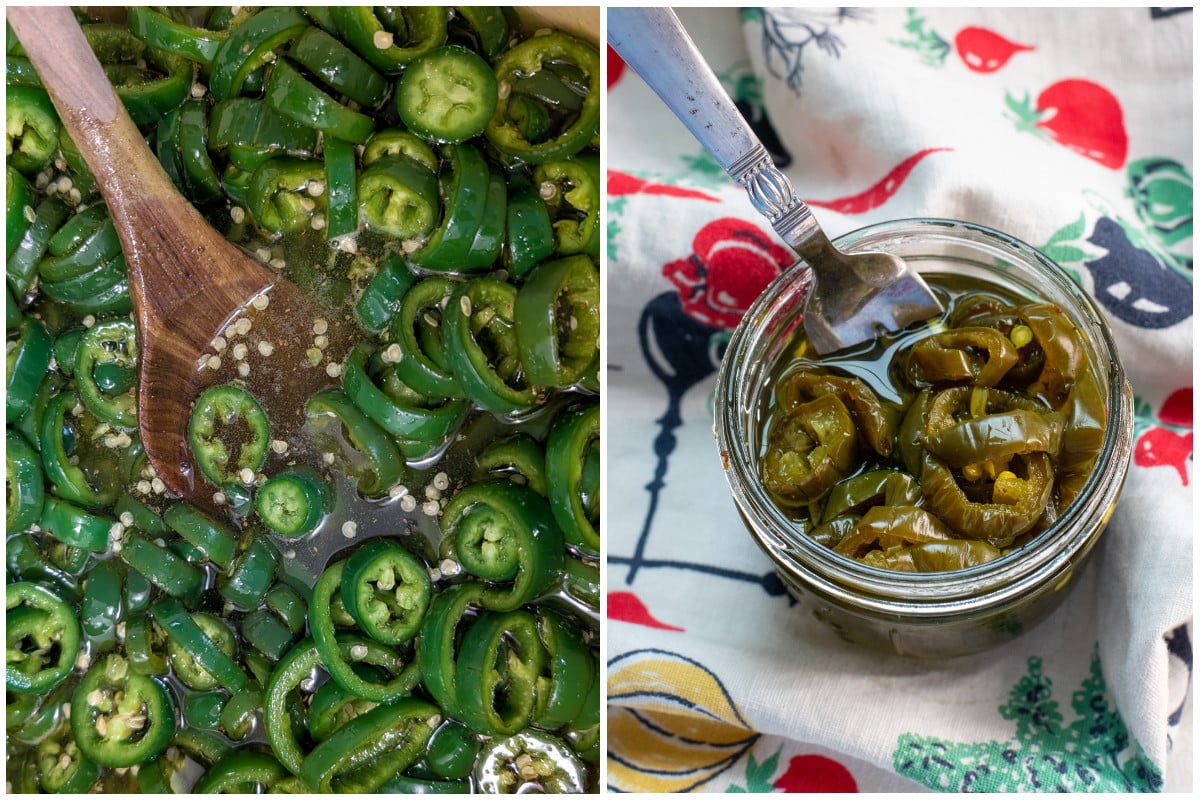
Wear gloves. Seriously. If you don’t have any, stop what you are doing and go to the store and buy some. Otherwise, there will be regrets. And maybe a trip to the ophthalmologist. Rinse your peppers well, then slice jalapeños into ⅛–¼ inch rounds. Remove stems and seeds. If you want spicier Cowboy Candy, leave the seeds in.
2. Make the Syrup

In a large pot, combine vinegar, sugar, and spices. Bring to a hard boil, then reduce to a simmer for 5 minutes. Bring to a rapid boil again.
3. Add Jalapeños

Stir in the sliced peppers and simmer for 4 minutes. They should begin to soften, but still be that lovely, vibrant green and red, not the sad green of canned peppers. (That comes later.)
4. Pack the Jars
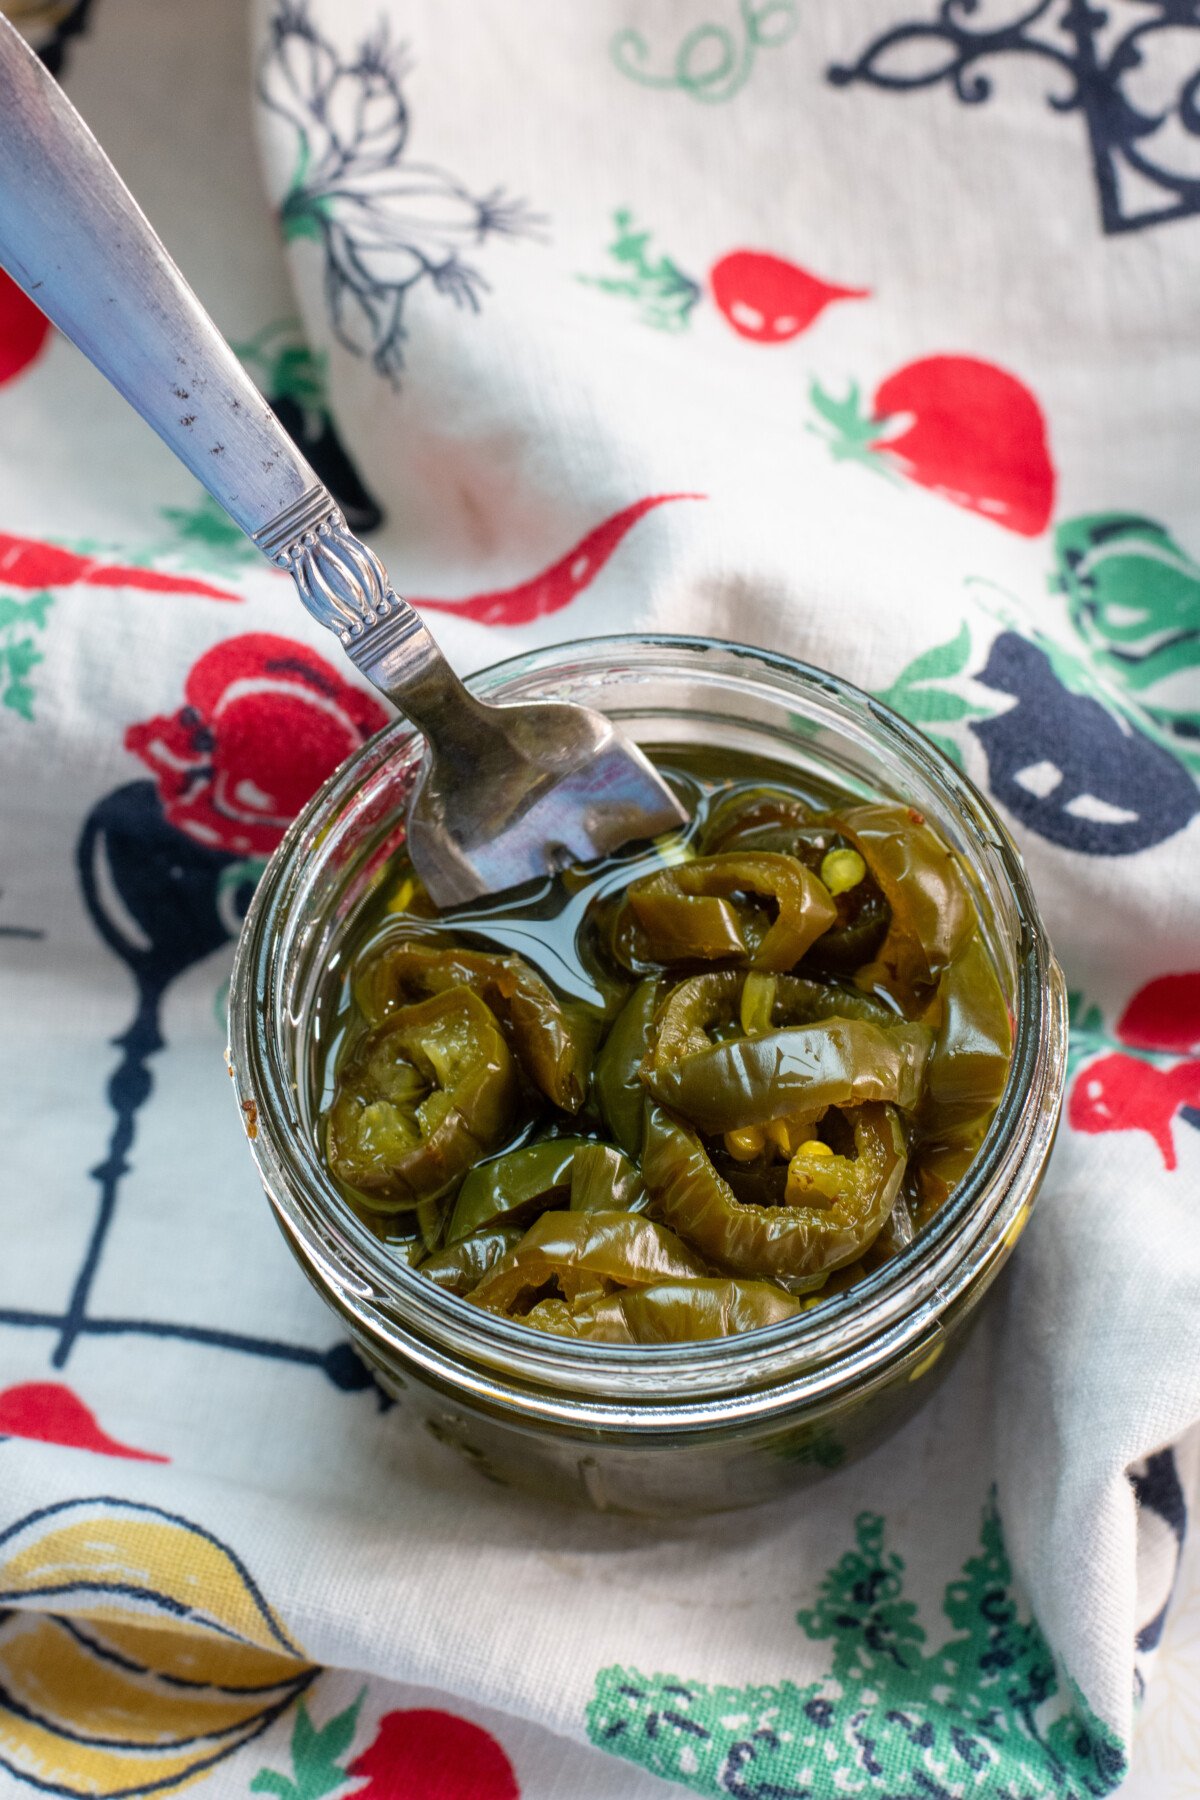
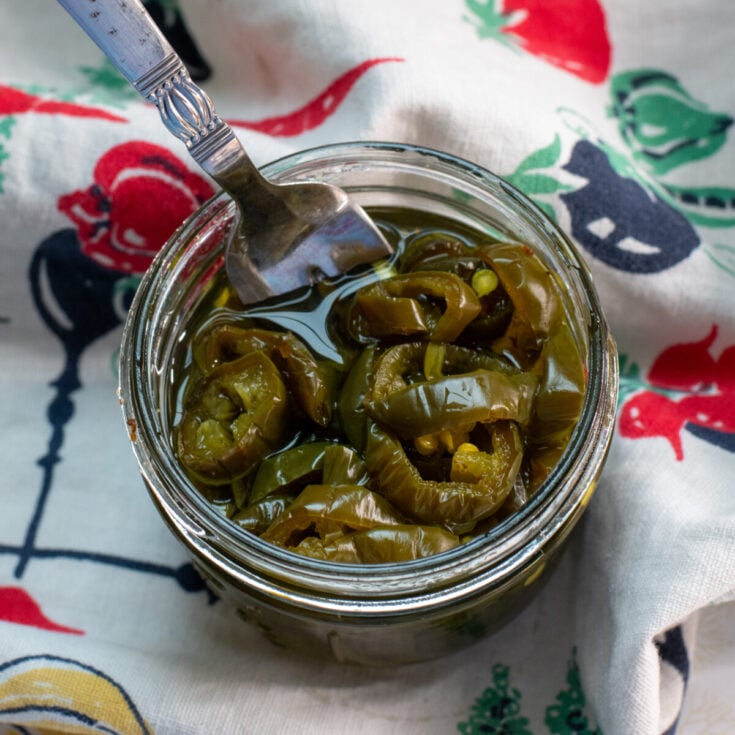
It’s easiest to use a slotted spoon to load the peppers into hot half-pint jars. Leave a ¼-inch headspace.
5. Pour In Syrup
Let the syrup simmer for another 5 minutes before ladling it over the peppers to cover, maintaining that ¼-inch headspace. Remove air bubbles with a chopstick or butter knife.
On to the canning! Get ready for steamy glasses, frizzy hair and the intensely satisfying PLINK! sound the jars make as they seal.
Water Bath Canning Instructions

Canning will finish cooking the peppers and make your Cowboy Candy shelf-stable for up to a year.
What You’ll Need:
- Half-pint mason jars with new lids and bands (Between 4-6)
- Water bath canner* or a large deep pot
- Jar lifter, funnel, and towel
* I absolutely despise single-purpose tools in my kitchen. They are a waste of space. That includes a big ol’ clunky waterbath canner. So, I ditched mine years ago and bought myself a huge, stainless steel stock pot that makes gallons of stock, lots of soup and it cans perfectly. (This one to be exact.)
Step-by-Step:
1. Use Clean, Hot Jars
Since we are processing for longer than 10 minutes, the good ol’ National Center for Home Food Preservation states that we don’t have to sterilize our jars beforehand.
My favorite way to get jars ready for canning is to run them in the dishwasher with the heat dry setting on. This keeps them hot and ready to go (not to mention tucked out of the way).
2. Prep Canner
Bring enough water to cover your jars by 1” to a boil in your water canner. Add 1 tablespoon of vinegar to prevent white mineral coating on jars from hard water.
3. Prep the Lids
Simmer (don’t boil) the lids in water for a few minutes to soften the seals.
4. Fill the Jars
If you haven’t already, fill your jars with peppers and syrup as described above.
5. Wipe and Seal
Wipe rims with a damp cloth. Center lids. Screw on bands finger-tight.
6. Process
Place jars in boiling water, making sure they’re fully submerged. Process for 15 minutes once water returns to a full boil. (To be clear, start your 15-minute timer once the water starts boiling again.)
7. Cool
Carefully remove jars and let sit undisturbed for 12–24 hours. Stand around enjoying the lovely “PLINK!” sound as they seal.
8. Check Seals
Press the center of each lid. If it doesn’t flex, it’s sealed. Any unsealed jars? Refrigerate and eat within a month.
Be Patient (Yeah, I know)
For the best flavor, let your Cowboy Candy sit 2–4 weeks before opening. This gives everything in the jar a chance to get cozy and become good neighbors, ensuring a flavorful, sweet, garlicky and spicy treat when you do open a jar.
If you’ve got some jalapeños leftover, you can slice them up and make a batch of jalapeño honey.
Okay, Tracey, I’m on board with this, but what the heck do you *do* with Cowboy Candy?

This stuff isn’t just a garnish; it’s an experience. Try it on:
- Cream cheese + crackers (classic)
- Burgers, brats, or hot dogs
- Grilled cheese (yeah, I know!) or quesadillas
- BBQ pulled pork or brisket
- Deviled eggs
- Pizza (trust me)
- Or just straight from the jar, especially if it’s the last jar and you’re trying to get away with eating it before the rest of the family finds out.
And don’t toss the leftover syrup—it’s pure gold. Drizzle it on cornbread, use it in marinades, or whisk it into salad dressing for a spicy kick.

Cowboy Candy
Yield: 4-6 half pint jarsPrep Time: 30 minutes
Cook Time: 30 minutes
Additional Time: 15 minutes
Total Time: 1 hour 15 minutes
A fantastic way to use up a lot of jalapenos fast! This sweet, spicy and tangy pickle is unlike any you've ever eaten.
Ingredients
- 3 lbs fresh jalapeño peppers
- 2 cups apple cider vinegar
- 6 cups granulated sugar
- ½ tsp turmeric
- ½ tsp celery seed
- 1 tbsp mustard seeds
- 1½ tsp garlic powder
Instructions
1. Pepper Prep
Wear gloves. Seriously. If you don’t have any, stop what you are doing and go to the store and buy some. Otherwise, there will be regrets. Rinse your peppers well, then slice jalapeños into ?–¼ inch rounds. Remove stems and seeds. If you want spicier Cowboy Candy, leave the seeds in.
2. Make the Syrup
In a large pot, combine vinegar, sugar, and spices. Bring to a boil, then reduce to a simmer for 5 minutes.
3. Add Jalapeños
Stir in the sliced peppers and simmer for 4 minutes. They should begin to soften, but still be that lovely, vibrant green and red, not the sad green of canned peppers. (That comes later.)
4. Pack the Jars
It’s easiest to use a slotted spoon to load the peppers into hot half-pint jars. Leave a ¼-inch headspace.
5. Pour In Syrup
Ladle the hot syrup over the peppers to cover, maintaining that ¼-inch headspace. Remove air bubbles with a chopstick or butter knife.
Notes
See instructions for water bath canning in the article above.
© ruralsprout
Category: Recipes
The post Cowboy Candy – the Best Thing to Do With Homegrown Jalapeños appeared first on Rural Sprout.